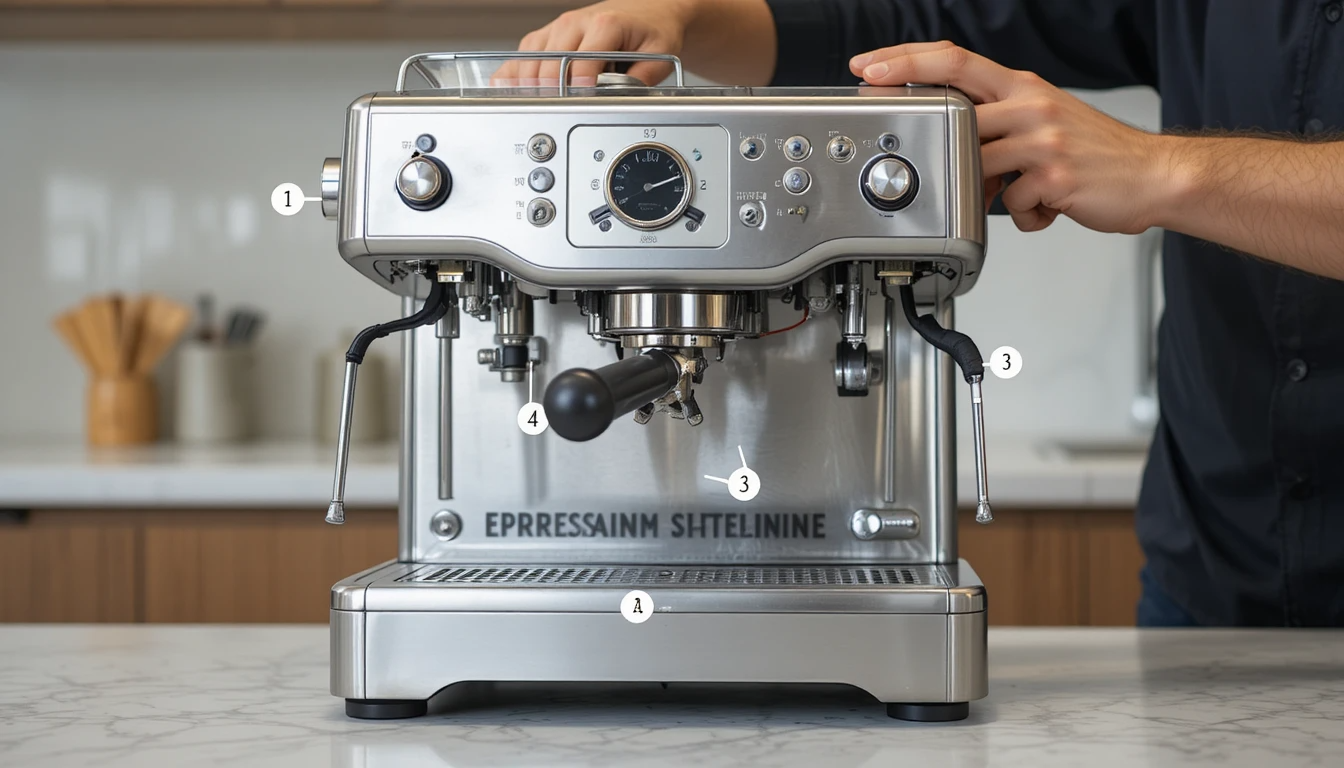
You’ve just unboxed your brand-new espresso machine, and the excitement is palpable. The promise of café-quality cappuccinos and velvety lattes made right in your kitchen is finally within reach. But as you stare at this gleaming piece of equipment with its various buttons, dials, and mysterious components, a nagging question emerges: where do I even begin?
Setting up an espresso machine at home might seem intimidating at first, especially if you’re transitioning from pod-based coffee makers or drip machines. The good news is that with proper guidance and a systematic approach, you can transform from a complete beginner to a confident home barista in just a few hours. This comprehensive guide will walk you through every single step of setting up your espresso machine, from initial unboxing to pulling your first perfect shot.
Whether you’ve invested in an entry-level machine like the Gaggia Classic Pro or splurged on a semi-professional model like the Breville Barista Express, the fundamental setup principles remain remarkably similar. By the end of this guide, you’ll understand your machine inside and out, know how to maintain it properly, and possess the skills to create espresso drinks that rival your favorite coffee shop.
What Is a Home Espresso Machine and Why Does It Matter?
A home espresso machine is a specialized coffee brewing device that forces pressurized hot water (typically at 9 bars of pressure) through finely ground, compacted coffee to produce a concentrated shot of espresso. Unlike regular coffee makers that rely on gravity and time, espresso machines use pressure to extract coffee’s oils, flavors, and aromatic compounds in just 25-30 seconds.
The magic of espresso lies in this pressure-driven extraction process. When executed correctly, it creates a rich, syrupy shot topped with crema—a golden-brown foam that indicates proper extraction. This espresso becomes the foundation for countless beloved beverages: lattes, cappuccinos, macchiatos, Americanos, and more.
Types of Home Espresso Machines
Before diving into setup, it’s helpful to understand which type of machine you own, as this affects certain setup steps. Manual machines require you to control pressure manually via a lever—these offer maximum control but demand significant skill. Semi-automatic machines automate water pressure but require you to start and stop extraction manually, offering an excellent balance of control and convenience. Automatic machines stop extraction automatically after a preset time or volume, simplifying the process further. Super-automatic machines handle everything from grinding to brewing to milk frothing at the touch of a button, though they sacrifice some quality and control for convenience.
Why Proper Setup Matters
Taking time to properly set up your espresso machine isn’t just about following instructions—it’s about establishing the foundation for consistently excellent coffee. Incorrect setup can lead to poor extraction, machine damage, inconsistent results, and shortened equipment lifespan. A well-configured machine, on the other hand, delivers café-quality espresso shot after shot, operates safely and efficiently, and provides years of reliable service with proper maintenance.
Getting Started: Essential Pre-Setup Preparations
Before you even plug in your espresso machine, complete these important preparatory steps to ensure a smooth setup process:
- Choose the Perfect Location: Select a stable, level surface near a grounded electrical outlet. Your espresso machine needs a dedicated spot with adequate clearance—at least 4-6 inches on all sides for ventilation and access. The location should be heat-safe, as machines generate significant warmth during operation. Ensure easy access to water (you’ll be refilling the reservoir frequently) and enough counter space for your grinder, tamper, knock box, and other accessories.
- Verify Your Water Source: Water quality dramatically impacts espresso taste and machine longevity. If using the internal water reservoir (most home machines), ensure it’s easily accessible. Fill it exclusively with filtered or bottled water—never use distilled water, as it lacks minerals necessary for proper extraction and can damage certain machine components. Hard tap water causes scale buildup that clogs your machine’s internal pathways, while heavily chlorinated water creates off-flavors in your espresso.
- Unpack and Inventory Everything: Carefully remove all components from packaging, checking against the manual’s inventory list. Typical items include the main machine body, one or more portafilters (the handled device that holds coffee), filter baskets in various sizes (single shot, double shot, pressurized), a tamper for compressing coffee grounds, a measuring scoop, cleaning tools and brushes, and water filtration components. Remove all protective films, stickers, and packaging materials from both visible and hidden surfaces.
- Read the Manual Thoroughly: Yes, this seems obvious, but many setup issues stem from skipping manufacturer-specific instructions. Every machine has unique features, requirements, and quirks. Spend 20 minutes reading through the manual before proceeding—you’ll save hours of troubleshooting later.
- Assemble Your Essential Tools: Beyond what came with your machine, you’ll need a quality burr grinder (the single most important accessory for espresso), a precision scale for weighing coffee doses, a timer or stopwatch for tracking extraction time, fresh whole coffee beans roasted specifically for espresso, and clean containers for catching water during flushing and priming processes.
- Check Electrical Requirements: Verify your outlet matches your machine’s voltage and amperage requirements. Most home machines operate on standard 110-120V outlets, but some high-end models require 220-240V circuits. Never use extension cords or power strips with espresso machines—the electrical draw can cause voltage drops that affect heating element performance.
Step-by-Step Setup Process for Your Home Espresso Machine
Now that you’ve completed the preparatory work, follow these detailed steps to properly set up your espresso machine:
Step 1: Initial Cleaning and Sanitization
New machines often contain manufacturing residues, oils from machinery, and dust from shipping. Before your first brew, thoroughly clean all removable parts. Remove the water reservoir and wash it with warm, soapy water, rinsing multiple times to eliminate any soap residue. Take out all filter baskets and the portafilter, washing them the same way. Wipe down the machine’s exterior and drip tray with a clean, damp cloth. If your machine includes a water filter, pre-soak it according to manufacturer instructions—typically 15-30 minutes in cold water—before installing it in the reservoir.
Step 2: Fill and Prime the Water System
Fill your clean water reservoir to the MAX line with room-temperature filtered water. Reinsert the reservoir securely into the machine, ensuring it’s properly seated—many machines won’t operate if the reservoir isn’t correctly positioned. Now you need to prime the system by filling all internal tubing and the boiler with water. Turn the machine’s main switch to position “I” (or press the power button, depending on your model). Many machines will automatically begin a priming cycle. If yours doesn’t, you’ll need to manually prime it by running water through both the brew head and steam wand.
To prime the brew head, place a large container (at least 16 ounces) under the group head without inserting the portafilter. Press the brew button and allow water to flow for 10-15 seconds, then stop. Repeat this process 3-4 times until water flows steadily without sputtering or air bubbles. To prime the steam wand, place another container under the steam wand, open the steam knob, and let water flow until it runs steady and clear—typically 5-10 seconds. You’ll hear gurgling sounds initially as air purges from the system; this is completely normal.
Step 3: First Heat-Up and Temperature Stabilization
Once primed, allow your machine to reach optimal operating temperature. Turn the machine to full power mode (position “II” or the main heating mode, depending on your model). Watch the temperature gauge if your machine has one—you’re waiting for the needle to reach the green zone or red band indicating proper brewing temperature, typically around 195-205°F (90-96°C). This initial heat-up takes 15-30 minutes depending on your machine’s boiler size and power. Larger boilers require more time but maintain temperature better during sequential shots.
Professional tip: even after the ready light illuminates, let your machine sit for an additional 5-10 minutes. This allows the entire brew path—not just the boiler—to reach optimal temperature. Cold group heads cool water during extraction, causing sour, under-extracted espresso.
Step 4: Warm Up the Portafilter and Group Head
Insert your empty portafilter (with a filter basket installed) into the group head and lock it in place. Run a blank shot by pressing the brew button for 3-5 seconds, allowing hot water to flow through. This serves multiple purposes: it heats the portafilter to brewing temperature, warms the group head and dispersion screen, flushes out any stale water sitting in the system, and confirms everything is functioning correctly. Leave the portafilter locked in the group head between uses—this keeps it warm and ready for your next shot.
Step 5: Set Up and Season Your Grinder
Your espresso grinder is arguably more important than the machine itself. Poor grinding produces terrible espresso regardless of how expensive your machine is. If you’re setting up a new grinder simultaneously, it needs seasoning. New burrs have microscopic imperfections and residual manufacturing oils that affect grind quality. Run 1-2 pounds of inexpensive coffee beans through your grinder and discard the grounds. This seasons the burrs, removing oils and smoothing microscopic rough spots for more consistent grinding.
Set your grinder to a fine espresso grind—imagine the texture of table salt or slightly finer. You’ll adjust this later based on extraction results, but starting with a proper baseline setting is important. If your grinder has a dosing chamber, make it a habit to purge (grind and discard) the first few seconds of coffee after any grind adjustment, as these grounds represent the previous setting.
Step 6: Prepare for Your First Shot
Place your espresso cup(s) on the cup warmer atop the machine if available, or fill them with hot water from the machine’s hot water spigot to preheat—cold cups cool espresso instantly, ruining the drinking experience. Weigh out 16-18 grams of fresh coffee beans (for a double shot) using your scale. This precision matters—even 1-2 gram differences significantly impact extraction. Grind the beans immediately before brewing. Coffee begins losing aromatic compounds within seconds of grinding, so never grind ahead of time for espresso.
Step 7: Dose, Distribute, and Tamp
Remove the portafilter from the group head and wipe the basket dry with a clean towel—moisture causes grounds to stick unevenly. Grind directly into the portafilter basket. Distribute the grounds evenly across the basket using a distribution tool (WDT tool) or by gently shaking and tapping the portafilter. Uneven distribution creates channels where water flows too quickly, ruining extraction. Place the portafilter on a stable surface and tamp straight down with firm, consistent pressure—approximately 30 pounds of force. The goal isn’t maximum pressure but level, even compression. After tamping, the coffee puck surface should be flat, smooth, and level with no cracks or gaps at the edges.
Step 8: Purge the Group Head
Just before inserting your portafilter, run water through the group head for 1-2 seconds. This purge removes any overheated water sitting in the system and ensures fresh water flows through your coffee. It also clears debris from the dispersion screen.
Step 9: Extract Your First Espresso Shot
Insert the portafilter into the group head and lock it firmly in place—it should require moderate force to turn and lock. Place your preheated cup(s) under the portafilter spouts. Start your timer and immediately press the brew button. Watch the extraction carefully. The first few seconds should show little to no flow as water saturates the puck (pre-infusion). After 5-8 seconds, espresso should begin flowing in thin streams resembling mouse tails—not drips, not a fast pour. The color should progress from dark brown to rich amber to light honey blonde over the course of the shot. Stop extraction when you reach your target yield, typically 36-40 grams of liquid espresso from an 18-gram dose (a 1:2 ratio), achieved in 25-30 seconds.
Step 10: Evaluate and Adjust
Taste your espresso. It should be balanced—sweet, with pleasant acidity and no overwhelming bitterness. If it’s sour, weak, or lacking body, your shot extracted too quickly (under-extracted). Grind finer for your next attempt. If it’s bitter, harsh, or astringent, your shot extracted too slowly (over-extracted). Grind coarser. Make only one adjustment at a time and maintain all other variables constant—this is how you systematically dial in your perfect shot.
Common Mistakes to Avoid When Setting Up Your Espresso Machine
Even with detailed instructions, beginners frequently make these errors that compromise their espresso quality:
- Skipping the Initial Flushing Process: Neglecting to thoroughly flush your new machine means your first espresso shots will taste like plastic, metal, or chemicals. Always run at least a liter of water through all water pathways before brewing your first coffee.
- Using Tap Water Without Filtration: Hard water creates scale deposits that clog narrow passages and damage heating elements. Chlorinated water tastes terrible and transfers those flavors to espresso. Always use filtered water, but never distilled water which lacks essential minerals.
- Not Allowing Adequate Warm-Up Time: Brewing before your machine fully stabilizes thermally produces temperature instability that results in sour, under-extracted shots. Always wait the full warm-up period recommended in your manual, typically 15-30 minutes.
- Using Pre-Ground or Stale Coffee: Coffee degasses rapidly after roasting and even faster after grinding. Stale coffee produces flat, lifeless espresso no matter how perfect your technique. Use whole beans roasted within the past 2-4 weeks and grind immediately before brewing.
- Neglecting to Weigh Coffee Doses: Eyeballing coffee amounts or relying solely on volume measurements (scoops) creates inconsistency. A quality scale removes guesswork and is essential for reproducible results. The difference between 16g and 19g dramatically affects extraction.
- Improper Tamping Technique: Crooked or inconsistent tamping creates channels in the coffee puck where water rushes through, leaving surrounding areas under-extracted. Focus on level, consistent pressure rather than maximum force.
- Forgetting to Purge Between Shots: The water sitting in the group head between extractions overheats. Always purge for 1-2 seconds before inserting your portafilter to ensure fresh, properly heated water flows through your coffee.
- Over-Tightening or Under-Tightening the Portafilter: Both create problems. Over-tightening can damage gaskets; under-tightening causes leaks and spraying during extraction. Lock the portafilter firmly until it stops naturally—don’t force it past the stopping point.
Advanced Tips and Tricks for Perfect Espresso Setup
Once you’ve mastered the basics, these expert techniques will elevate your home espresso game significantly:
Master Temperature Surfing
Single-boiler machines experience temperature fluctuations between brewing and steaming modes. Learn temperature surfing—timing your shot extraction to coincide with optimal temperature windows. Typically, this means pulling shots immediately after the heating element cycles off, when temperature peaks at ideal brewing range. Advanced users monitor this through PID controllers or learn to read their machine’s behavior cues.
Implement the Weiss Distribution Technique (WDT)
After dosing grounds into your portafilter, use a thin needle or specialized WDT tool to stir the grounds in a deliberate pattern. This breaks up clumps and distributes grounds uniformly throughout the basket, eliminating the channeling that causes uneven extraction. This simple 10-second step dramatically improves shot consistency and quality.
Perfect Your Pre-Infusion
Pre-infusion gradually introduces water to the coffee puck before full pressure extraction begins, allowing grounds to bloom and creating more uniform extraction. Some machines offer programmable pre-infusion; others achieve it manually by turning the pump on briefly (2-4 seconds), pausing, then starting full extraction. Experiment with pre-infusion duration to find what works best with your specific beans and roast level.
Create a Maintenance Schedule From Day One
Establishing good cleaning habits immediately prevents problems later. Daily tasks include purging the steam wand after every use, back-flushing with water through a blank basket, emptying and rinsing the drip tray, and wiping down all surfaces. Weekly tasks include back-flushing with espresso machine cleaning powder, removing and deep cleaning shower screens and gaskets, and descaling if you live in a hard water area. Monthly tasks include completely disassembling and cleaning the portafilter and group head components, and replacing water filters if applicable.
Upgrade Strategic Components
Not all upgrades are equal. The most impactful improvements for most machines include replacing the standard basket with a precision basket (VST or IMS brands), which features more uniform hole patterns for better extraction. Upgrade to a properly-sized tamper that fits your basket diameter precisely, eliminating gaps at the edges. Install a bottomless (naked) portafilter to visually diagnose extraction problems and perfect your technique. Consider adding a PID temperature controller to machines without one for precise, stable brewing temperature.
Keep a Coffee Journal
Document your espresso journey. Record the coffee bean origin and roast date, exact dose weight, grind setting number, extraction time and yield, tasting notes, and what adjustments you made and why. This data becomes invaluable for troubleshooting, reproducing exceptional shots, and understanding how different variables interact. After a few weeks, patterns emerge that fast-track your skill development.
Essential Tools and Resources for Home Espresso Success
Your espresso machine is just one component of a complete setup. These additional tools and resources ensure consistently excellent results:
Must-Have Equipment
- Quality Burr Grinder: This is the most critical investment after the machine itself. Blade grinders produce inconsistent particle sizes that make proper extraction impossible. Entry-level options include the Baratza Encore ESP ($170-200), which now offers true espresso capability. Mid-range excellence comes from the DF54 ($280-350), offering near-professional performance with 54mm flat burrs ideal for both espresso and filter coffee. For manual grinding enthusiasts, the 1Zpresso X-Ultra ($199) delivers outstanding espresso grinding at a fraction of electric grinder prices.
- Precision Scale: A scale accurate to 0.1 grams is essential for consistent dosing and monitoring extraction yield. Look for models with fast refresh rates and built-in timers, such as the Acaia Lunar or budget-friendly options like the Hario Drip Scale.
- Proper Tamper: The included plastic tampers are universally terrible. Invest in a quality metal tamper sized precisely to your basket diameter—typically 58mm for most home machines. Calibrated tampers that click at consistent pressure help develop muscle memory for even tamping.
- Knock Box: This container with a sturdy bar allows you to firmly knock spent coffee pucks from your portafilter without making a mess or damaging your garbage can.
- Milk Frothing Pitcher: For milk-based drinks, a stainless steel pitcher with a pointed spout enables proper milk texturing and latte art. Start with a 12-20 ounce size for versatility.
- Distribution Tools: A WDT tool (needle distributor) breaks up clumps and distributes grounds evenly. A leveling tool like the OCD (OneDose Distribution) creates a perfectly level puck surface before tamping.
Cleaning and Maintenance Supplies
Proper maintenance preserves your investment and ensures every shot tastes fresh. Stock espresso machine cleaning powder (Cafiza or Puly Caff brands) for regular back-flushing, descaling solution appropriate for your machine type, group head cleaning brushes with sturdy bristles, microfiber cleaning cloths that don’t leave lint, and blind filter baskets for back-flushing procedures.
Learning Resources
Accelerate your espresso education through quality resources. YouTube channels like James Hoffmann offer exceptional technical content on espresso fundamentals and advanced techniques. Online communities including Reddit’s r/espresso provide troubleshooting help and inspiration from thousands of home baristas. Consider barista training courses—many roasters offer weekend workshops teaching proper espresso technique, milk steaming, and latte art basics.
Troubleshooting Common Setup and Extraction Problems
Even with careful setup, you’ll encounter issues. Here’s how to diagnose and fix the most common problems:
Problem: Water doesn’t flow when brewing button is pressed. Solution: Check that the water reservoir is properly seated and filled above the minimum line. Ensure the machine is fully warmed up—pumps won’t engage until proper temperature is reached. Verify the portafilter is correctly locked into the group head. If the problem persists, the pump may need priming—consult your manual for specific priming procedures.
Problem: Coffee sprays or leaks from the portafilter during extraction. Solution: This typically indicates improper sealing. Check that the portafilter gasket isn’t worn or damaged—gaskets should be replaced annually with regular use. Ensure you’re not over-dosing the basket—coffee grounds should sit at least 2-3mm below the basket rim after tamping. Verify the basket and portafilter threads are clean and free of coffee residue that prevents proper seating.
Problem: Espresso extracts too fast (under 20 seconds). Solution: Under-extraction produces sour, weak espresso. Grind finer to increase resistance and slow water flow. Ensure you’re using enough coffee—18 grams is standard for a double basket. Verify you’re tamping with adequate, consistent pressure. Check that your coffee is fresh—stale coffee extracts too quickly.
Problem: Espresso extracts too slowly (over 35 seconds) or not at all. Solution: Over-extraction creates bitter, harsh espresso. Grind coarser to decrease resistance. Ensure you’re not overfilling the basket beyond capacity. Check that you’re not tamping too hard—30 pounds of pressure is sufficient. Verify the shower screen isn’t clogged with coffee oils by back-flushing with cleaning powder.
Problem: No crema or very thin crema on espresso. Solution: Crema indicates proper extraction and fresh coffee. Verify your beans are fresh (roasted within 2-4 weeks) and properly degassed (wait 4-7 days after roasting for optimal results). Ensure adequate dose (at least 16-18 grams for doubles). Check that your extraction isn’t too fast, which under-extracts oils and doesn’t build pressure necessary for crema formation. Some naturally-processed or light-roast coffees produce less crema regardless of technique—this doesn’t necessarily indicate poor espresso.
Problem: Machine not heating or heating slowly. Solution: Verify the machine is switched to full heating mode, not just position “I”. Ensure voltage at your outlet matches machine requirements—use a multimeter if uncertain. Check that scale buildup isn’t insulating heating elements—descale if you’re in a hard water area. Some machines have thermal fuses that trip if overheated—consult your manual or contact manufacturer support.
Problem: Channeling visible in extraction (when using a bottomless portafilter). Solution: Channeling occurs when water finds the path of least resistance through the puck. Improve your distribution technique using WDT to break up clumps. Ensure level, consistent tamping pressure. Don’t tap the portafilter after tamping, as this creates cracks in the puck surface. Use fresh, dry baskets—moisture causes uneven coffee distribution.
Conclusion: Begin Your Home Barista Journey with Confidence
Setting up an espresso machine at home represents more than just following instructions—it’s the beginning of a rewarding journey into artisan coffee making. While the initial process might seem complex, each step builds your understanding of how this remarkable machine works and how small adjustments create dramatically different results in your cup.
Remember that even professional baristas needed time to develop their skills. Your first shots won’t be perfect, and that’s completely normal. Espresso is a craft that rewards patience, observation, and willingness to experiment. Every extraction teaches you something new about how coffee beans, water, pressure, and temperature interact to create that perfect shot.
The most important thing you can do now is simply begin. Set up your machine following these guidelines, pull your first shot, taste it critically, make one adjustment, and try again. With each attempt, your muscle memory improves, your palate develops, and your understanding deepens. Before long, these steps will become second nature, and you’ll be producing espresso that exceeds anything you’ve purchased from even the finest cafés.
Your espresso machine represents an investment in daily joy—the ritual of grinding fresh beans, the mechanical satisfaction of tamping and locking the portafilter, the anticipation as rich espresso flows into your cup, and finally, that first sip of coffee you created entirely yourself. This is what home espresso is truly about.
Start today. Follow this guide step-by-step, take your time, and don’t get discouraged by initial imperfect results. Within a week, you’ll be pulling consistently good shots. Within a month, you’ll be creating café-quality espresso drinks that impress everyone who tastes them. Your home barista journey begins with proper setup—and now you have everything you need to succeed.
What espresso drink will you master first? Share your setup progress, challenges, and first-shot experiences in the comments below—the home barista community thrives on shared learning and mutual encouragement!